With the new Dragon Soul raid now live, it’s time to start getting ready for the new raid and its associated challenges. This guide is intended to provide a few handy tips and hints for Discipline Priests in particular. It’s focused on 10-man normal modes, with a heroic version to follow.
I’d like to acknowledge drawing on the videos and guides from Learn2Raid and Icy Veins for information, and also the summaries posted on our forums by Gravarc from <Abraxas>.
As always, input welcomed.
Contents
Fight Summary
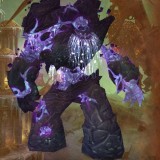
There are four main mechanics and two phases to deal with: a main phase and then a special move, after which we’re back to the regular phase again. He also becomes Furious at 20% HP, increasing his attack speed by 30% and his damage by 20% while the rest of the fight remains unchanged.
In the main phase Morchok will Stomp roughly every 12-15s, which will deal 750,000 physical damage to everyone within 25 yards, and the two closest players (who should be the two tanks) will take a double share. Thus the tanks will take (before mitigation) 125,000 damage and everyone else should take 62,500 damage (or as high as 83,300 and 167,000 if all of the crystal team are out of range). The raid should typically be grouped well within 25 yards because of this mechanic.
From time to time Morchok will summon a Resonating Crystal somewhere roughly 35-40 yards from him. This explodes after 12 sec, dealing 90,000 Shadow damage split between the three closest players, with the damage increasing the further those players are from the crystal. Coloured beams show who’s currently closest, and the colour of the beam is a guide to distance: red is far, yellow medium and blue close. Those assigned, or just the three nearest people if you want to be more laid back about things, should go hug those crystals (ideally they need to get a blue beam), and will need healing back up afterwards.
Tanks will be affected by a stacking debuff called Crush Armor which reduces their armor (duh!) by 10% per stack, up to 10 stacks. The debuff lasts 20 sec and will therefore require tank-swapping at 4 stacks or so, depending on how often the debuff gets applied.
Roughly every 1 min 40 sec Morchok will pull the raid to him and stun them while channelling Falling Fragments for 5 seconds, and then casts Black Blood of the Earth, sending black slime flowing outwards which deals 5,000 Nature damage per second to anyone in it, increasing their Nature damage taken by 100% for 6 sec, stacking up to 20 times.
The raid should run outwards as soon as the stun breaks, because underneath Morchok is an Earthen Vortex which deals 5% of max HP per second to anyone close to Morchok, and should go stand behind the earth spikes left behind by Falling Fragments, which block the flow of the Black Blood of the Earth (and line of sight) and thus create safe spots. It might be helpful for healing to have the raid all run in one direction, although the damage on normal is far from life-threatening.
When the Black Blood has gone, the main phase begins again.
Spec and Glyphs
For grouping-heavy fights like this I tend to go with the PW:B and PoH glyphs. Since there isn’t much ticking damage that would make PoM worthwhile casting and there’s also nothing to Dispel Holy Nova might be worth a go on this fight to allow you to get some healing in on the raid as you’re running out behind the earth spikes.
For spec, if you’re on raid or float duties here I’d be inclined to pick up Soul Warding for this fight, depending on how much damage the Resonating Crystal does. You do have time to cover all three players without Soul Warding though, since they will be running in for 12 sec.
I also quite like Archangel for this one; the damage comes in peaks and troughs and people can be grouped up close enough that Atonement won’t be wasted, and you may be able to have boosted output for every other Stomp.
Cooldown Usage
Morchok will take around 5 minutes for the average raid, so given this fight length I’d suggest getting a PW:B in on one of the early Stomps so it should be off cooldown for one of the later Stomps under the enrage. It helps to use raid cooldowns on Stomps when Morchok is enraged, much as we do currently on Heroic Rhyolith, Majordomo or Beth’tilac. Remember that the new and (slightly) improved Divine Hymn can be used after a Stomp too.
Pain Suppression should be used to support tanks during the enrage too, when they’ll be taking extra damage from the stomp on top of his melee damage and may not be able to rotate cooldowns for every one. Earlier in the fight, it might be handy if a crystal soaker finds themselves far from the crystal; look out for any red-coloured beams.
Life Grip could save someone’s bacon if they’re slow to run out to get away from the Black Blood, but beware of getting caught in it yourself.
Finally, the Black Blood phase is a good time to use Hymn of Hope, since people should be close enough to benefit and there’s no damage caused while you’re safely behind the pillars. Shadowfiend ought to be safe from the Black Blood because it’s AoE damage, and Morchok himself can still take damage.
Other Tips
Because the damage is relatively predictable, this ought to be a fight where Discipline shines. You can use Archangel to give yourself a boost before roughly half of the Stomps and stack Divine Aegis nice and high in preparation for the other half, and if your mana can take putting a PW:S on the three crystal soakers you ought to see quite a tasty healing spike there.
Yorsahj the Unsleeping (Top)
Fight Summary
Yorsahj is a complicated fight, because of the degree of randomness involved. His primary attack is a Void Bolt which deals 90,000 Shadow damage to his tank and adds a 5,000 Shadow damage per 2 sec DoT to them that stacks up to 20 times, necessitating tank-swapping after 3-4 stacks.
The rest of his abilities depend on the Blood adds that spawn, chosen from a selection of six. You get to kill only one add of the three, because attacking one heals the others to full very quickly and they become immune once one has died, so you always have to deal with two abilities each time although you can pick your combination. The key to this fight is understanding what each ability does so you can be prepared for the damage, and working out which combinations you need to avoid so that you know which add is the best choice to kill.
Those abilities in detail:
- Blue (Cobalt): Yorsahj can summon a Mana Void. This steals all the mana from ranged casters and healers when it spawns and stores it within itself. When it dies it casts Mana Diffusion redistributing all that mana evenly between players within 30 yards of the Mana Void. Note: the tooltip says 30 yards, but also says “20 yard range”; to me it felt more like 20 yards in practice. Whatever the range is though, you certainly don’t have to hug it the whole time, so don’t waste time trying to do that!
Having no mana has been scientifically proven to seriously impair your ability to heal, so you must be ready to deal with this when it happens through the use of mana cooldowns.
- Purple (Shadowed): Yorsahj places Deep Corruption on every player for 25 seconds. Every time a player receives a direct heal or absorb effect, i.e. PW:S, they gain a stack of Deep Corruption. At 5 stacks, they will explode for 50,000 Shadow damage to the raid, therefore healers must be very careful with their heals. AoE heals like Prayer of Healing apply a stack to every player, so extra care must be taken with those.
- Yellow (Glowing): Yorsahj gains the Glowing Blood of Shu’ma buff, doubling his attack speed, halving his cooldowns and changing his Void Bolt to add an AoE effect: 2 sec after he casts his usual Void Bolt at the tank, he fires a second, modified Void Bolt at the entire raid. This extra one hits for only 35,000 Shadow damage though, and does not DoT the raid. Overall, in practice, with a Glowing Blood extra tank damage is the thing to watch.
- Red (Crimson): Yorsahj casts Searing Blood on three random raid members, dealing at least 35,000 Fire damage to them, increasing based on their distance from him. Therefore to minimise this damage the raid needs to stack up on Yorsahj.
- Dark (Black): Yorsahj summons Forgotten Ones which fixate on random players and Psychic Slice them for 35,000 Shadow damage every 5 seconds. Again, the raid should stack up so that these can be killed quickly with AoE attacks.
- Green (Acidic): Acidic Globules spawn, which use Digestive Acid to deal 60,000 Nature damage to random players and players (or pets) within 4 yards of them. When the Green Blood is up, the raid should be spread out.
Essentially the trick is to avoid the sucky combinations. Since Green requires spreading while Red and Black require grouping, and Purple is just plain annoying and can make healing through other effects very difficult, Green or Purple will be the top good candidates for killing.
Blue combined with Red is also a bad combination to have, because stacking on the boss (Red) conflicts with stacking on the Mana Void (Blue).
You’ll need to make a decision each time on which add to kill to get the least bad combination of adds.
Spec and Glyphs
As with Morchok, there’s a lot of grouped-up AoE healing in this fight, so PoH and PW:B come to the fore. Unlike Morchok, PoM should get plenty of opportunity to bounce around so glyphing it could pay off on this fight.
If you can spare the points, having a shorter cooldown on Shadowfiend might be valuable too in this fight so you’re more likely to have it available should a Cobalt Blood phase occur, either for use immediately after the Mana Void spawns or in case you aren’t able to get to the Mana Void to get your mana returned.
Cooldown Usage
PW:B is extremely useful when the raid is grouped up for a Red or Black Blood, especially if there is also a Yellow Blood when the damage gets highest. Divine Hymn on the other hand is more useful in a Green Blood phase, partly because of its larger range and partly because it will smart-target the few people who need heals.
Pain Suppression should be reserved for tanks during Yellow Blood phases, because they will be taking significantly increased damage.
Life Grip could be used if someone is slow to move in for a group-up phase, particularly a Red Blood phase since their damage depends on the distance they are from the boss and they really need to be in close.
Shadowfiend and Hymn of Hope can be used immediately after the Mana Void has finished stealing your mana, so that you can get back to healing quickly. It may be worth coordinating Mana Tide and Hymn of Hope usage within your raid so that you always have one or the other available for a Blue Blood.
Other Tips
All I can say is be aware of which buffs are up so you know the damage profile. Yellow means high tank damage, Red, Black and Green mean higher raid damage.
Purple means be very careful of your heals. It might be better to heal people with serial Greater Heals than a Prayer of Healing if not everyone needs a heal at that time, so that you don’t add stacks to people unnecessarily which you’ll regret later. It might well be useful to assign healers to specific groups to prevent cross-healing and double-healing wasting stacks. Only “direct heals” will add a stack, so if push comes to shove you could always break out Renew because it should be safe; I’m not certain about Prayer of Mending, a glyphed PoM might be a good non-stack-building tool to use liberally.
Warlord Zon’ozz (Top)
Fight Summary
This one is a very funky encounter in two phases.
The core mechanic in the primary phase is handling the Void of the Unmaking which Zon’ozz spawns near the start of this phase. The raid is split into two camps, one melee and one ranged standing at the far edge of the water pool, about 30 yards from the boss. The Void travels out from Zon’ozz, and the ranged group pretty much immediately gets in its way. When it reaches them, it casts Void Diffusion, dealing 180,000 Shadow damage split between all players within 20 yards, gains a stack of Void Diffusion, and bounces back in the opposite direction. It then travels towards the boss, where the melee group intercept it and bounce it back again. Each bounce increases the damage it deals when it Diffuses by 20%, so after a few bounces the AoE damage becomes unmanageable. Clever cooldown use allows the raid to take additional bounces, which helps later on, because…
When the raid feels the Void has done enough bouncing around, typically around three bounce cycles or 5-7 stacks of Void Diffusion depending on your raid, the melee group runs away from Zon’ozz and allows the Void to hit him. This makes Zon’ozz run to the middle of the room where he will stand and take 5% increased damage per stack of Void Diffusion. This phase lasts 30 seconds before the primary phase restarts.
During this phase the raid should all group up on Zon’ozz and get as much DPS in on him as possible. Healers will be busy too, because Black Blood of Go’rath will fill the room, dealing 14,000 Shadow damage per second to the raid. This is tuned pretty well to make you work without being too frantic.
During the primary phase, healers should also be aware that Zon’ozz will be stacking Focused Anger on himself, increasing his physical damage and attack speed by 10%, so the tank will take increasing damage as the phase goes on. He will also be putting a 35,000 Shadow damage per 2 sec DoT called Disrupting Shadows on random players. This should be dispelled ASAP, but since it does a small knockback and deals around 60,000 Shadow damage when dispelled care should be taken to ensure the person has enough time to get back in to split the damage before the Void reaches them and isn’t too low on health to begin with. One healer per camp, should be assigned to dispelling so they can see what’s going on and when the time is right.
It’s also important not to stand in front of Zon’ozz, because his primary attack is a frontal cone Psychic Drain for 120,000 Shadow damage, which leeches health if it hits people and that’s clearly a Bad Thing.
Spec and Glyphs
Once again that PW:B glyph could come in handy, as could the PoH and PoM glyphs for the AoE phase. The Glyph of Dispel Magic also might be of use on this fight, depending on your raid composition, since there’s actually some dispelling to do and every little helps, right? Alternatively you could consider Holy Nova if you’re finding yourself moving around a lot to control the Void, although that shouldn’t be the case if your raid is on the ball (pun intended).
An AA spec works well here, at least in theory, to help with the start of the AoE phases. Between bounces you’re able to build Evangelism stacks, just don’t do what I did and let them fall off every time while staring in wonder at this pretty purple ball and trying to get in its way.
Cooldown Usage
There’s a choice about when to use PW:B on this fight, because you can either use it on the ranged group to get an extra bounce in if your tank is stable and you want to push for more bounces, or save it for the heavy AoE phase. You’ll probably be able to use it every other AoE phase, so work your rotation around that. Divine Hymn, in its upgraded form, should be part of your arsenal for handling the AoE phase if it all gets a bit hairy.
Pain Suppression is probably be best used on the tank when Zon’ozz’s stacks of Focused Anger are getting high (time it for a for a Psychic Drain cast if you can, these hurt!), although bear in mind that it might also be extremely valuable for saving someone’s life if they are low health as the Void reaches their group.
Life Grip could either be used to bring in slowbies who haven’t grouped up quickly enough in the AoE phase, or for pulling back people who have been knocked away from (or otherwise moved away from) the Void as it approaches. Especially on 10-man good stacking for the Void will be important if you want to push high stacks and get Zon’ozz down more quickly.
Depending on how many bounces you take, there will probably be a quiet time after the AoE phase and before a new Void spawns, so that would be a good time to use Hymn of Hope/Shadowfiend. Get your group healed up after the AoE and then go for it. Shadowfiend should ideally be timed with HoH, as usual.
Other Tips
Bubbles are your friend on the first phase of this fight, because there are very spiky periods where 3-4 people will take a good solid chunk of damage. Plus, if you need to dispel someone, a swift PW:S immediately before or after they’re dispelled could prevent them from dying to a Void Diffusion, an occasion when the effective health bump that PW:S represents really shows through.
Do make sure to talk to your raid leader about getting the raid groups set up so that you can use PoH properly though, because the damage will affect half the raid at a time and you want them all together. Healing people up and getting DA stacked before the Void arrives helps a lot.
Also be sure to coordinate with fellow healers or raid members about the use of healing cooldowns in the AoE phase. Divine Guardian, Divine Hymn, Tranquility and so on can really help keep the healing from getting too intense.
Hagara the Stormbinder (Top)
Fight Summary
Hagara is a fight in three phases: a normal phase, then either a Frozen Tempest or a Lightning Storm, always then going back to a normal phase again.
In the normal phase Hagara will do two main abilities that make keeping the raid alive more difficult. She will channel Focused Assault, dramatically increasing tank damage for 5 seconds, which requires quick healing and perhaps tank cooldowns to survive.
She will also spawn crystals around the room which will focus a player, indicated by a red beam, and repeatedly cast Ice Lance at them, dealing 15,000 Frost damage with a 3-yard splash. To help with keeping this player alive, other ranged can step into the beam and soak up an Ice Lance or two if necessary.
She will also periodically cast Shattered Ice on a random player, dealing 77,500 Frost damage to them and freezing them, so the raid needs to be kept nearly topped off as much as possible and this debuff needs to be dispelled ASAP because Ice Lance deals triple damage to frozen targets.
Finally, she will encase a pair of people in Ice Tombs which will DoT them until broken and will also block line of sight. Players targeted for Ice Tomb should move together to a designated spot near the raid and wait to be broken out. The tombs do not chain like Sindragosa’s used to, the only reason for not running to the middle of the raid is that they may obstruct the healers’ line of sight to the raid.
In the Frozen Tempest phase, Hagara is immune because she is inside a bubble of water which fills the grey circle in the middle of the platform. Standing inside this bubble will cause Watery Entrenchment, killing you quickly, so as this phase starts you should already be running to the outside.
She will spawn 4 Binding Crystals around the edge of the platform which need to be killed to end the phase. However this is complicated because of Icicles falling from above and Ice Waves, which are lines of icy spikes erupting from the floor which move clockwise around the platform, starting from the point between two crystals, forcing the raid to keep moving. To avoid the Ice Waves, you need to stay near the edge of the bubble, because if you try and run around the edge of the platform you may not be able to stay ahead of the waves.
In the Lightning Storm phase, Hagara is also immune, but her bubble is only a personal one this time. She spawns 4 Crystal Conductors which need to be overloaded to end the phase.
A Bound Lightning Elemental add spawns, which is picked up by the tank and killed near a Crystal, overloading it. This causes the Crystal to chain damaging lightning to nearby players, which can be chained to additional players in order to reach the next Crystal around the platform, overloading it in turn, eventually ending the phase. All the while, the raid is also taking steady damage from the Lightning Storm which also stacks every 12 sec or so, increasing Nature damage taken by 5% per stack.
The Chain Lightning damage can be extremely high, so your raid needs to decide who will form the chains so you get the chaining over with as quickly as possible. Have your Mages, Warriors, Warlocks and other mobile classes take the furthest positions. You need three people to form each chain, so you can have the tanks and DPS do this and leave the healers free to stand near the middle and just heal.
At the end of this phase, Hagara is stunned and takes 100% additional damage for 15 sec.
Spec and Glyphs
No stand-out suggestions here. There is moderate AoE damage in the Lightning phase, so the usual AoE glyph selection would work. Choose between Holy Nova which you might find useful in the movement-heavy Frozen Tempest phase and Prayer of Mending which should be bouncing happily in the Lightning Storm phase, to suit your playstyle. However, the raid will be very spread out in the Lightning phase and you’ll find yourself firefighting quite a lot.
Cooldown Usage
The best use of PW:B is on Ice Lance targets in the normal phase. Assuming the raid is fairly clumped up, you should be able to get all of them within range of the PW:B, and this helps a lot with survivability.
Because of the Focused Attacks ability that Hagara uses, Pain Suppression is be very useful to keep a tank alive through it, or otherwise you might find it useful if people end up taking damage from the chain lightning for too long while you’re coordinating the overloading of the Crystals.
Life Grip, once again, comes into its own for rescuing the slowbies, especially in the Frozen Tempest phase where people may find themselves trapped on the wrong side of Icicles or a little too close to Ice Waves. Be sure that you yourself are far enough away from the Ice Waves that the recipient of the yoinking can re-orientate themselves afterwards though.
Hymn of Hope and Shadowfiend can be used at your discretion. The Frozen Tempest phase would be a bad time due to the high movement, and while the normal phase has low movement the healing demands may prove to be too high to fit a full channel in. Go with what works for your raid. I noticed that the best time was actually right at the beginning of the Lightning phase, using my Shadowfiend on the add and popping Hymn of Hope.
Other Tips
If you have a Holy Priest in your raid it might be worth going easy on the PW:S in the Lightning and especially the Frozen Tempest phases, because Body and Soul may be a big help for positioning and getting the hell out of the bubble/Ice Wave respectively.
In the Lightning Phase, finding a suitable place to stand and heal will be the order of the day; you really don’t want to be chasing your raid around like a lost puppy, so work out in advance if you can where they’re likely to be and where they’re likely to go to, so you can plan ahead.
This one doesn’t feel on the whole like a healing-heavy fight so much as a whole-raid execution fight, although there will undoubtedly be some heart-stopping moments in Phase 1 and the Lightning phase if your raid are slow, so quick reactions are essential.
Fight Summary
Ultraxion is a one phase fight with a very tough 6-minute enrage timer and some instagib effects to watch out for and react to, but little movement.
Before the pull, Ultraxion will draw the whole raid into the Twilight Realm, and all players gain the Heroic Will ability, which an take them out of the Twilight Realm for 5 sec.
All the while the raid will take damage from Unstable Monstrosity, which deals 300,000 Shadow damage split between all players in the Twilight realm. Every minute throughout the fight, the time between these casts goes down by a second, from 6 sec at the start to 1 sec by the end, increasing the damage commensurately.
Every 15 sec, then 30 sec, then 15 sec (alternating depending on whether or not there is an Hour of Twilight cast in between) Ultraxion will place the Fading Light debuff on his current tank and one random raid member which will kill them after it expires (this can start anywhere between 5 and 10 sec) if they are still in the Twilight Realm, so they should use their Heroic Will ability to get out in time. The player affected will generate no threat for 10s after this effect ends, so a second tank will need to taunt just before the previous tank uses Heroic Will, so be prepared for tank swaps.
Every 45 seconds Ultraxion will cast Hour of Twilight, which deals 300,000 unresistable Shadow damage to anyone left in the Twilight Realm. If no player remains, the Aspects take the damage instead and the world ends (and worst of all, you wipe). Players must use Heroic Will to get out in time and one player needs to remain behind with a cooldown to take the Hour of Twilight damage, which may be a tank or a Shadow Priest with Dispersion, depending on your raid’s preference. The timing is such that the tank who pulls will take every Hour of Twilight, but will not necessarily have enough cooldowns available for every one, so have backups assigned before you begin.
That’s pretty much it for things to deal with on the fight. There is one more aspect to it though (no pun intended this time), which is the buffs granted to players by the Dragon Aspects in the room.
- Tanks gain a buff from Thrall at the start of the fight which allows them to use their defensive cooldowns twice as often and doubles their duration, which is extremely useful for surviving the fight and particularly the Hour of Twilight.
- Three of the five Aspects each spawn a crystal in the room which can be clicked by healers (the game knows!) to provide healing buffs. Each crystal will only provide its buff once, and each healer can only have one buff, so these need to be agreed in advance. The buffs are:
- Gift of Life (Red): Spawns after about 1 min 30 sec. Gift of Life increases all healing done by 100%.
- Essence of Dreams (Green): Spawns after about 2 min 30 sec. Essence of Dreams causes each heal or HoT tick above 1500 from the player to also heal the entire raid for the same amount, shared equally among all players within 50 yards.
- Source of Magic (Blue): Spawns after about 3 min 30 sec. Source of Magic reduces mana cost of all spells by 75% and increases spell haste by 100%.
- After about 5 min, Nozdormu grants every player Timeloop. This buff prevents one death per player by healing the player to 100% and removing the buff from them.
The key here is fighting over who gets which of the healing buffs because, let’s be honest, we all want all of them!
Gift of Life (Red), which doubles the players healing output, is probably better suited to a high output raid healer. Single-target healers (read: tank healers) may find this just translates to more overhealing on the big heals, and it’s important to note that it does not affect absorbs directly (although DA would benefit, PW:S would not). Discipline Priests spamming Prayer of Healing can benefit from this one quite nicely, but it’s less useful for tank healing.
I should point out here that with the new Holy Radiance Holy Paladins might actually prefer the raid healer job on this fight instead of tank healing, in which case this buff might be a good one to give to them.
Essence of Dreams (Green) also more or less doubles your healing output, but spreads the extra healing out to the whole raid as a steady AoE trickle. This one should go to the player who naturally pumps out vast quantities of heals, and my prime pick here would be a tank-healing Holy Paladin; they can certainly crank out the numbers and the extra healing is far less likely to turn into overhealing than if they took the red buff.
Note: as of a Hotfix of 1st December 2011, HoT ticks need to be above 1500 to trigger Essence of Dreams, so bear this in mind. The ticks from Holy Radiance will often be too small to trigger this, as will Earthliving, Wild Growth and Regrowth. Rejuvenation should be fine, as should a Holy Priest’s Renew. Essentially this is being restricted to “real” HoTs, possibly to reduce load due to vast numbers of little procs.
Source of Magic (Blue) is most people’s preferred buff, and it’s a lot of fun as a Discipline Priest. Whatever your spec, if you get this buff, it’s time to blow your biggest, costliest and most impressive heals over and over again. Bear in mind that PW:S doesn’t get much benefit from this, except in terms of mana cost, because you’ll end up GCD-capped and won’t gain the full benefit of the haste bonus; PoH spamming, on the other hand, gets you nearly doubled HPS at a mana cost that allows you to spam it freely.
Whichever buff you get, a Discipline Priest should see a pretty similar benefit. The least valuable is probably the Green, since the Red and Blue let you get double the benefit from DA while the Green doesn’t. In the end we’ll probably be determined by the other healers and which buffs they take.
Spec and Glyphs
The fight is essentially an AoE healing extravaganza, so come glyphed and equipped for that. If you end up with the Blue buff you might find the Glyph of Power Word Shield valuable here, perhaps in place of the Glyph of Prayer of Healing (the HoT probably won’t get more than a tick or two in before it’s overwritten), although I’d have to do some testing to be sure.
Given the existence of the Blue buff, I might also be inclined to pick up Soul Warding again for this fight. With a 75% reduced mana cost the liberal application of PW:S may well become viable again, and PW:S is still our highest throughput spell, although this will need to be tested to know for sure.
Edit: Didn’t get the opportunity to test this out this week, instead I stuck to PoH spamming with a bit of PoM thrown in and a Divine Hymn for good measure. It seemed to work out acceptably. Next week it’ll be time for a bit more experimentation though.
Cooldown Usage
The raid will be stacked up in the same place for the entire fight, so PW:B is ideally suited. Since the Unstable Monstrosity damage ramps up as the fight progresses, and is pretty punishing especially in the last minute of the fight, make sure it will be available for that time. Don’t be afraid to use it early though, so you can use it twice. Unfortunately you will only get one Divine Hymn whatever you do, and again it’s worth saving for the last minute if you can. If you get the blue buff, Divine Hymn is simply amazing!
You may be required to use Pain Suppression on a tank to help them survive the Hour of Twilight, but if not then don’t be afraid to use it on yourself or another raid member if their health gets low, or on your tank anyway if you or your fellow healers need a mana break. This fight has the potential to tax healers’ mana, so every little helps. As with PW:B, use it early, use it twice.
Life Grip sadly won’t see much use here since the raid ought to be pretty much glued to the spot, but you never know!
Because of the enrage timer you will only get to use Hymn of Hope once, so I’d recommend using it early along with Shadowfiend so that you can get another Shadowfiend in, albeit late in the fight. There’s not a particularly quiet time to use it, but do watch out for the Hour of Twilight and Fading Twilight counters so that you can try and avoid wasting the cooldown by having to use Heroic Will at an inopportune moment.
Other Tips
Make sure your raid stacks at the base of the stairs, because this is where the crystals will spawn. They will still be in range of Ultraxion, and it will prevent you from having to move to get your assigned healing buff.
When Hour of Twilight is cast you have 5 seconds before you need to cast Heroic Will, so you can squeeze out one or two more heals, although if you fail you die, so be sensible with it.
If you raid with a Holy Paladin, remember that they are going to be very powerful raid healers on this fight (and many others too), so you may find yourselfhelping with the tanks while they take on the raid healing duties, especially if they’re assigned to an early buff. That said, the raid is where the vast majority of the damage is focused, especially later in the fight.
A final tip comes from the Icy Veins guide:
[Heroic Will] cannot be keybound, and it may not display properly (or at all) if you are using any action bar add-ons. Fortunately, you can use the following macro:
/click ExtraActionButton1
Clicking this macro (which, of course, can be keybound), has the same effect as clicking the Heroic Will button.
This may well be extremely valuable to healers and others who rely on action bar mods. I know from my own experience that Bartender has been updated and lets me see this button. (Other bar mods are available).
Warmaster Blackhorn (Top)
Fight Summary
This fight is a two-phase fight aboard the gunship Skyfire. The first phase is an add phase, and once this is over you fight Warmaster Blackhorn himself.
In the first phase, you are dealing with Blackhorn’s dragon, Goriona, and a few types of adds.
Goriona’s only ability in this phase is to cast Twilight Onslaught at the gunship’s deck roughly every 35 seconds, leaving a 10-yard purple swirly void zone that the entire raid must stand in. Twilight Onslaught deals 800,000 damage split between all players within it. If no one stands in it the Skyfire takes the full damage instead, which is bad.
Twilight Assault Drakes, after dropping off their riders on the deck, cast Twilight Barrage from range, dealing 300,000 Shadow damage to anyone within 5 yards of the impact point. These are essentially the same as Twilight Onslaught, and at least 2 players should move in to soak them up. Letting some through is not the end of the world but you will need to soak some; keep an eye on the Skyfire’s HP and make a judgement call.
Ranged DPS will be assigned to killing the Drakes; the harpoon guns on the deck will automatically chain them and pull them in for a while before they break free again.
Twilight Elite Dreadblades and Slayers both Blade Rush a distant enemy dealing 100,000 Physical damage to anyone in the way, marked in advance by a line of red circles. Dreadblades also have a frontal cone attack, Degeneration, which deals 80,000 Shadow damage to enemies in front and applies a stacking 6,000 Shadow damage per 2 sec DoT which lasts 1 minute, while Slayers instead use Brutal Strike, which deals 150% weapon damage and applies a stacking 6,000 Physical damage per 2 sec DoT lasting 1 minute.
These should be picked up and tanked facing away from the raid and each other, and the melee should work on killing them off.
Finally Twilight Sappers will spawn from time to time, and will run to the ship’s bridge and attempt to blow themselves up. If they do, they will take off 20% of the Skyfire’s HP, so it’s vital that everyone switches to these as soon as they spawn and burns them down quickly. After they spawn near the front of the ship, on alternating sides, they cast smoke bomb and disappear for a while, only to reappear about halfway down the ship. They can, and should, be stunned and slowed to enable your raid to kill them in time. They can spawn at the same time as Onslaught, so you’ll really have to pay attention to controlling them during these conjunctions.
After 3 waves of adds, Warmaster Blackhorn himself will land on the deck while Goriona stays in the air bombarding the raid with Twilight Flames, which stick around for a while as a patch of purple fire and deal 30,000 Fire damage to anyone within the 7-yard radius. Players should move out of these patches to avoid the damage.
Ranged DPS should DPS Goriona until she’s had enough and flies away, then go join the melee in DPSing Blackhorn himself.
Ranged and healers should stay around 15 yards from Warmaster Blackhorn, so that they are outside the range of his Disrupting Roar which deals 65,000 Physical damage and interrupts spellcasting in a 10-yard radius, while staying close enough that moving out of the way when he Shockwaves a random target for 100,000 Physical damage is practical. Meanwhile the tanks will need to swap due to Blackhorn using Devastate, reducing his target’s armour by 20% per stack for 30 sec.
The final mechanic to make things tricky is Vengeance, which increases Blackhorn’s damage as his health decreases, making the fight much harder on healers the longer it goes on.
Spec and Glyphs
Bursty AoE damage makes the Glyph of Prayer of Healing an appealing choice here, and PW:B will also be handy for dealing with Twilight Onslaught in phase 1 and Disrupting Roar late in phase 2, so it’s probably worth glyphing it. There’s nothing to dispel, so the choice between PoM and Holy Nova will come down to playstyle, assignment and how much movement the fight actually entails in practice.
Spec choice is pretty much down to assignment and playstyle. An AA spec could be handy to lend some extra DPS to the raid and be ready for healing up after the Twilight Onslaught.
Cooldown Usage
PW:B and Divine Hymn (to complement another cooldown) can be part of a raid cooldown rotation for the Twilight Onslaught, and may also be valuable later in the phase 2, particularly on the melee group and tanks, when Disrupting Roar starts to hit especially hard. Pain Suppression will also be very useful towards the end of that phase when tanks will be taking a serious pounding.
Life Grip should be at your fingertips here, both for getting people to stack for the Twilight Onslaught and for getting people out of Blackhorn’s Shockwave once he engages.
There are lulls between Onslaughts where Shadowfiend and Hymn of Hope can be used more or less safely, and if you get a second bite at the cherry then try and go as early in phase 2 as possible so that you don’t run out of mana just as Blackhorn is at the hitting like a truck stage.
Other Tips
As a healer you need to heal and not spend too much time running around, but it’ll make everyone’s lives easier if you can help soak up some of the Twilight Barrages that are near you. Spreading out to different parts of the gunship will help reduce each healer’s movement.
In the first phase, you should be able to prepare to some extent for the Twilight Onslaught, and remember that you don’t need to immediately spread out again afterwards, just take your time and heal the raid for a few seconds.
In the second phase, again you can prepare for the Disrupting Roar. Don’t worry too much about the melee, you get quite a while between Roars to heal people up and since this is the only source of unavoidable damage they’re not going anywhere!
Spine of Deathwing (Top)
Fight Summary
The Spine of Deathwing is the first of two parts to the defeat of Deathwing. In this fight you are deposited from the Skyfire onto Deathwing’s back, where you need to defeat waves of adds to remove the armour plates from his back and weaken him. There’s a cinematic each time, if you press Esc you skip it and can begin immediately. Either all do it or none though!
When the fight starts there will be four Corruption tentacles. These will infrequently (roughly every 30 sec) stun a random player for up to 30 sec with Fiery Grip, also dealing 60,000 Fire damage to them every 3 sec until the stun is broken by enough damage being dealt to the Corruption. They also chain cast Searing Plasma on a random player every 8 seconds, which deals 10,000 Physical damage to the target every 10 seconds for 5 minutes or until the player has received 200,000 healing, all of which will be absorbed by the Searing Plasma.
For healers, Searing Plasma is the main, crucial mechanic to handle. You have to be proactive in getting this off players by pumping 200,000 healing into them, because you really don’t want to have it up on many people during any of the raid damage portions of the fight (Superheated Nucleus or a barrel roll) because that’s how people die, especially if they get stunned as well.
Killing a Corruptions allows two types of adds to spawn from the holes they leave behind, which are needed to complete the fight. This gets complicated, so bear with me!
Firstly there will be one Hideous Amalgamation. This is a large add which needs to be tanked and held near an Armor Plate. It deals manageable melee damage initially, but this will increase as it lives longer. The second type of add that spawns is Corrupted Blood. These are also tanked, but do extremely weak melee damage.
Because of the stuns, and more importantly the ridiculous healing-absorbing debuffs, the Corruptions do, the best way to start is to kill 3 of the Corruptions, then make Deathwing do a barrel roll to get rid of the Amalgamations again before killing the final Corruption and starting the fight from there. To make Deathwing do a barrel roll the whole raid needs to move to one side of his back. This will dislodge all Amalgamations (but not Corrupted Blood) and any players not rooted to the ground either by Fiery Grip or by the Grasping Tendrils debuff gained from standing in the holes in Deathwing’s back.
Note that there will always be at least one Corruption active; when you’ve killed the fourth one a fresh one will spawn to replace it pretty much immediately.
Corrupted Blood adds need to be brought near to the Amalgamation and killed. When they die they leave a burning ball on the ground which the Amalgamation gets dragged over to gain a stacks of Absorbed Blood, which increases the damage of the Amalgamation by 10% and its attack speed by 20% per stack, up to 9 stacks. They also Burst, dealing 10,000 Physical damage to the whole raid. Corrupted Blood constantly respawn from the lava patches, and as the fight goes on there will be more lava patches and thus more Corrupted Blood.
When the Amalgamation reaches 9 stacks it gains the Superheated Nucleus buff, and begins to pulse 15,000 Fire damage every 3 seconds to the whole raid. It should be at around 5% before you reach this point, so it can be killed quickly next to an Armor Plate. On death, it will spend 5 seconds casting Nuclear Blast, dealing 350,000 Fire damage to anyone caught within 10 yards and raising up an Armor Plate exposing a Burning Tendons (one creature, plural name). The raid needs to quickly target this add and kill it before it finishes casting Seal Breach after approximately 23 seconds, or the plate will re-attach (although the Tendons do not heal up again) and you’ll need to start with a new Alamgamation. Note that each plate is actually sealed by two tendons, one on the left and one on the right; which one is exposed depends which side of the centre the Amalgamation is killed, and you only need to kill one to remove the plate. If for any reason you do fail to kill a Tendon in one go, make sure you reveal the same one again.
Once you kill the Burning Tendons is dead, and the plate flies off, two more Corruptions will where it used to be, allowing you to spawn new Amalgamations and start the cycle again. The recommendation is to spawn two Amalgamations by killing the old Corruption and one of the new ones, barrel roll to get rid of them, then spawn the second new one and use it to deal with the next Armor Plate.
Spec and Glyphs
The bulk of the damage in this fight will come from Burst on melee and Superheated Nucleus on everyone, making it another AoE-heavy encounter. It isn’t movement-heavy and there’s nothing to dispel, so the Glyph of Prayer of Mending might be a good pick for a Major slot. You may also consider taking PW:S instead of PoH in a Prime slot too, because I reckon you’re best off focusing on mitigation and that means bubbles.
I would also recommend a Soul Warding spec for this fight. As a Disc Priest it can feel distinctly not-great to be designed around doing lower actual healing and making up for it with absorbs when you’re faced with the majority of the healing you do being straight-up absorbed. However, where Disc comes into its own here is in preventing people who can’t be healed up from taking damage in the first place by throwing them a PW:S and putting down PW:B before Superheated Nucleus. Soul Warding lets you cover everyone with Searing Plasma in a hurry, which is a big help. If you’re going to do that, try and grab Veiled Shadows too, as much for the DPS boost it’ll give your raid as for the extra mana on what can be a long and draining fight.
Of course, don’t neglect to heal people, but there are other healers and they can get the debuff off as well.
Cooldown Usage
The raid can safely group up because the adds do not cleave. PW:B is extremely useful on the Superheated Nucleus phase (which should be very short if the add is brought low before soaking up the Corrupted Blood, but may not be), and Divine Hymn is great for mopping up after the second Superheated Nucleus when PW:B will probably be on cooldown. PW:B should come off cooldown again before the third time around.
Because of the stacking damage increase from Absorbed Blood, the Amalgamations will hit progressively harder as the fight goes on, making Pain Suppression very valuable as a tank cooldown. Your tank can delay this for a while through careful movement and the raid can help by not cleaving, but some Corrupted Blood will end up dying under the Amalgamation anyway. It’s probably not strong enough to save someone from Nuclear Blast though, which is why we have Life Grip, so keep it handy!
During the first Burning Tendons phase is the best time to pop Shadowfiend and Hymn of Hope. There’s a small lull in raid damage, and assuming your raid handled Superheated Nucleus properly there shouldn’t be too much to heal. Plus, the extra damage ensures you get it killed in one go. It may come off cooldown again before the third Armor Plate, depending on how efficient your raid is, so you may get a second bite at the cherry.
Other Tips
As the Amalgamation reaches high stacks, begin preparing for the Superheated Nucleus, which will deal a lot of damage until the Amalgamation is killed. Priority is to get PW:S on the people with Searing Plasma (because they can’t be healed with the debuff) and PW:B on the stack point if it’s off cooldown. Then pop AA (if you have it) and lay down some DA or PW:S on everyone else. If you have spare capacity, it’s worth sending a PoM bouncing too.
You’ll spend most of your time working on the raid, because the tank damage is pretty low on the whole, but do watch the tanks’ health be ready to support them as the Amalgamation’s damage climbs with their Absorbed Blood stacks.
If you really don’t have anything else to do, look for people with Searing Plasma on your raid frames and throw heals (greater or regular, as your mana allows) at them to help remove it.
Madness of Deathwing (Top)
Fight Summary
The final fight in the Dragon Soul, where we finally get to help Thrall and the Dragon Aspects defeat Deathwing once and for all. Probably. Until the next time…
After we weakened him, Deathwing has crashed into the stormy waters of the Maelstrom, grabbing onto each of four islands with his claws.
In Phase 1 the raid needs to defeat each of his limbs, labelled as Arm or Wing Tentacles, before you finally get to attack his head in Phase 2. A Dragon Aspect starts off flying above each island, granting you a buff:
- Alexstrasza (Left): Grants Alextrasza’s Presence, increasing maximum HP by 20%. She also destroys Blistering Tentacle adds which spawn in Phase 1.
- Nozdormu (Middle-Left): Grants Nozdormu’s Presence, increasing haste by 20%. He also casts Time Zone on the current platform, slowing enemy attack speed and slowing down the approach of Elementium Bolts, giving the raid time to kill them before they land.
- Ysera (Middle-Right): Grants Ysera’s Presence, increasing healing done by 20%. She also gives all players the Dream ability, which is a 5 second 50% damage reduction cooldown on a 30 sec cooldown.
- Kalecgos (Right): Grants Kalecgos’ Presence, increasing damage dealt by 20%. He also gives the raid the Spellweaver buff, which makes all attacks also deal 23,000 Arcane damage in a 6-yard radius.
When you clear a platform, that Aspect will break off to begin attacking Deathwing, removing their buffs from you. So the order in which you clear the platforms can significantly affect how difficult the fight becomes.
The recommended order, although your raid may wish to alter this, is:
- Ysera’s Island
- Alexstrasza’s Island
- Nozdormu’s Island
- Kalecgos’ Island.
On the islands, you will need to deal with several types of adds, and these take priority over killing the Arm or Wing Tentacle.
Shortly after the Tentacle is engaged a Mutated Corruption tentacle will spawn near the back of the island. This Impales the main tank dealing 400,000 Physical damage to them, requiring the use of Dream while available and tanking cooldowns on subsequent platforms. You also need to tank-swap, because the debuff left behind increased Impale damage by 100%, making it tricky to survive even with cooldowns. Mutated Corruptions also target a random player and cast a frontal cone Crush in their direction for 100,000 Physical damage, so the raid needs to spread out to keep as few people from being hit simultaneously as possible.
45 seconds into each platform stage, Deathwing will send an Elementium Bolt at the platform. When it lands, and every 5 seconds after that, it will pulse Elementium Blast dealing up to 390,000 Fire damage each time, decreasing dramatically the further you are from the landing site (marked with a yellow swirl). It has lowish HP and while Nordormu’s Time Zone is up it should be targeted and killed by ranged DPS before it lands. Once Nozdormu’s buff is gone, the Elementium Bolt will shoot in at high speed and just hit the ground, although you get several seconds warning before it lands. The raid needs to get the hell away from the Bolt, and then quickly target it and kill it as quickly as possible. Raid cooldowns and personal cooldowns are very useful here.
Once the Bolt is dead, switch back and finish off killing the Mutated Corruption.
90 sec after the Tentacle is engaged it will begin to haemorrhage, spawning 6 Regenerative Blood adds. These have an energy bar which fills over 10 sec (or 20 sec if they’re taken inside the Time Zone); when the bar is full they heal themselves back up to full. AoE should still be enough to kill them while you have Kalecgos’ Presence, although if this proves problematic then you may need to switch to focusing them down one at a time.
The final set of adds is spawned by the Arm or Wing Tentacle at 75%, 50% and 25% HP. Blistering Tentacles deal pulsing AoE Fire damage via Blistering Heat; each application deals 2,500 Fire damage and increases Blistering Heal damage taken by 5%. While Alexstrasza is assisting you these will be killed off automatically, but on the later platforms you will have to kill these off yourselves. They are immune to AoE and so must be killed using cleaves and single-target attacks only.
Finally, after 2 minutes on each platform Deathwing will begin casting Cataclysm
unless the Arm or Wing Tentacle is dead. While this is casting (for 60 sec) the Aspect assisting you will grant you a 100% damage buff. If the cast completes, you die instantly, and you also take 1,500,000 Fire damage just to make sure.
Once all 4 platforms have been cleared, Deathwing’s head will drop forward onto Ysera’s platform and you can finally get to killing him.
However in phase 2 there are yet more adds to handle.
Three Elementium fragments (small orange tentacles) spawn first, and fire Shrapnel at a random raid member each. This is a 6-second cast that deals 200,000 Physical, armour-piercing damage to a random raid member. To survive it you need a cooldown, and it just so happens Ysera has given you that handy Dream button again. Watch for a debuff called Shrapnel, that’s your warning you’re being targeted.
The two Elementium Terrors should be picked up by the tanks, one each, and killed quickly before their Tetanus DoT, 20,000 Shadow damage per second, stacking, kills the tanks. Tanks should chain cooldowns (if any remain) to survive, because the damage is brutal.
Adds spawn every 90 seconds, and in the mean time DPS should be doing their utmost to put Deathwing out of his misery.
Spec and Glyphs
The fight varies so much, so go with what your composition requires of you. The Mutated Corruption, especially with the Impales, really requires decent tank healing, as does phase 2, but there’s also a fair degree of burst AoE to make AA valuable, as well as times when Soul Warding would come into its own as well (multiple people get Crushed, pre-shielding for the Elementium Bolt in P1 or Shrapnel in P2). If you have a Paladin they’re best assigned to the Mutated Corruption tank because they can bubble through the Elementium Bolt landing, so I’d say go with a raid-healing spec with SW and be looking to see if you need to change.
There’s nothing to dispel here and little movement requiring healing, so I’d run with the PoM major glyph unless you find you need the survivability boost from Inner Fire.
Cooldown Usage
PW:B is an excellent tool for mitigating the Elementium Bolt’s initial damage. Plant it near the Arm or Wing Tentacle and have your raid group up underneath it while the bolt lands. In theory if you get the timing right it will still be up for the pulse 5 seconds later, but in practice you need it down for a couple of seconds to let your raid get to the right spot and so you don’t miss the Bolt, so this probably won’t work every time.
Once the Elementium Bolt has landed, this is a great time to hit Divine Hymn as well, for the added healing boost and to get people up to protect them from a possible pulse or a Crush from the Mutated Corruption.
The very high amount of damage this combination represents is why it’s recommended to take Nozdormu as the third island, so you only have to deal with it once.
Depending on the speed with which you clear the islands, your tanks may run out of cooldowns for Impale at some point, so be ready with a Pain Suppression (and PW:S) for them. We found it was consistently happening to the first tank on the third island. Remember that tanks will have 50% cooldowns and smaller 20% cooldowns, but the 20% version alone will probably be insufficient, so communicate with them about when they’ll need an external cooldown; it should be predictable, your raid’s DPS shouldn’t vary too much.
I haven’t had to use Life Grip on this fight yet, although it would be useful to get people out of the way of the unslowed Elementium Bolt, so do keep an eye out for that.
Finally, those mana cooldowns. It takes approximately 11 minutes to reach phase 2 and approximately 3-4 minutes to complete phase 2, so you should be able to get three Shadowfiends and three Hymns off during that time. Except for Phase 2 the damage is manageable most of the time, so use SF and HoH at the most opportune moment, to line up with Bloodlust and/or +intellect procs. Your raid may use Bloodlust once or twice over the fight (once either in phase 2 or on the last island as required, and then possibly one at the very start) so find out this information and SF appropriately.
Other Tips
If you haven’t already got it included, add Shrapnel to your custom debuffs, so you can see who’s about to take a huge hit from the Elementium Fragments. Also, make yourself a PowerAura or whatever for it, because it’s easy to miss this debuff on yourself and it’s a killer if you don’t hit the Dream button or pop a cooldown in time. Beware: the cast time of Shrapnel is 6 seconds while Dream’s duration is 5 seconds, so don’t hit Dream too early!
Power Infusion will be up every time Deathwing casts Cataclysm, which makes the limb tentacle take 100% increased damage, so if you can spare it, consider casting it on a DPS at this point for a nice boost to them.
Possibly Related Posts:
